How to Make a DIY Face Mask
 Updated: Apr. 09, 2020
Keep yourself and others safe and healthy with this DIY face mask.
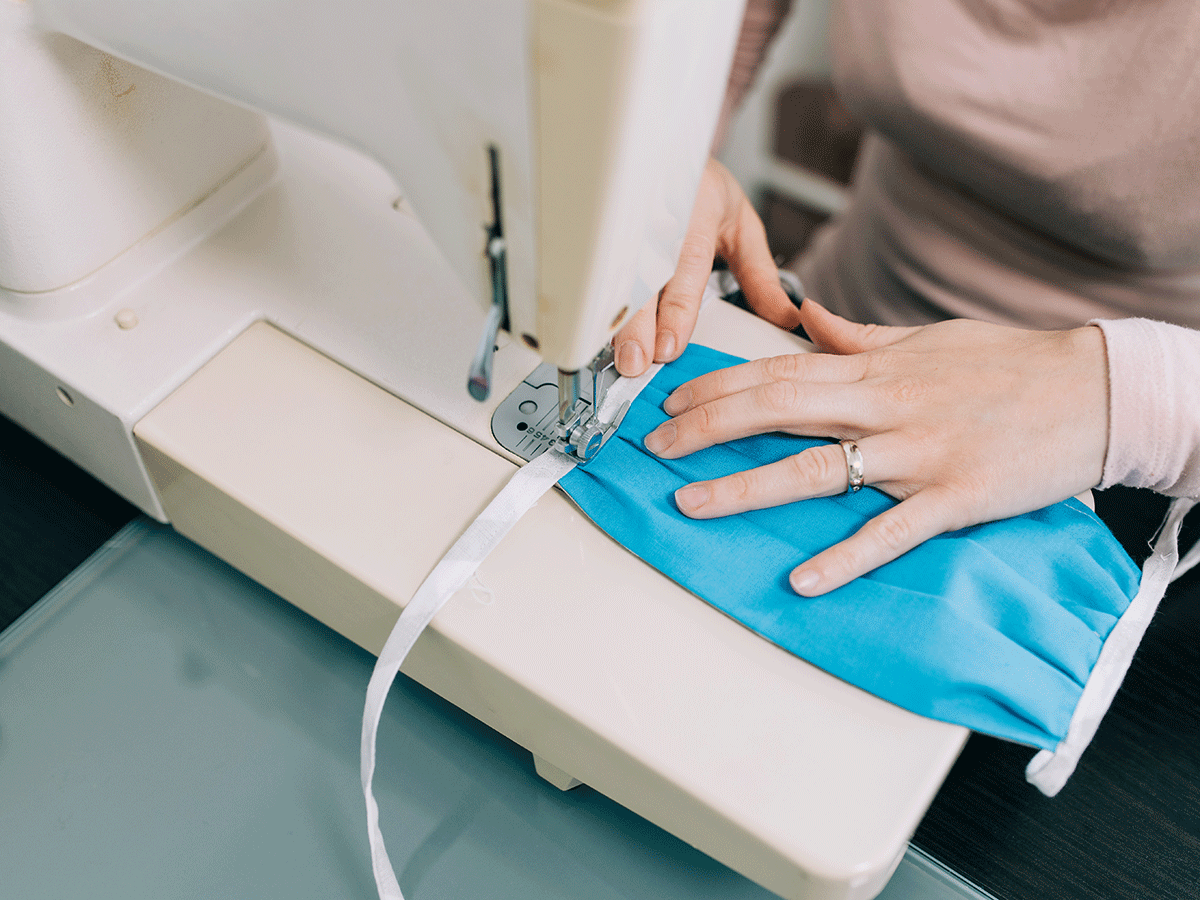
DIY Face Mask
What we know about coronavirus changes day to day, yet one fact has remained constant: It is primarily transmitted through the nose and mouth.
On April 6, Dr. Theresa Tam, Canada’s Chief Public Health Officer, advised Canadians to start wearing a non-medical face mask to help stop the spread of coronavirus in situations where it’s harder to maintain proper physical distance. “A non-medical mask can reduce the chance of your respiratory droplets coming into contact with others or land[ing] on surfaces,” said Dr. Tam.
Save the medical gear for health-care professionals, and make your own to help prevent transmission of the virus by people who are asymptomatic or otherwise unknowingly infected. Here’s a guide to a DIY face mask using common items in your home.
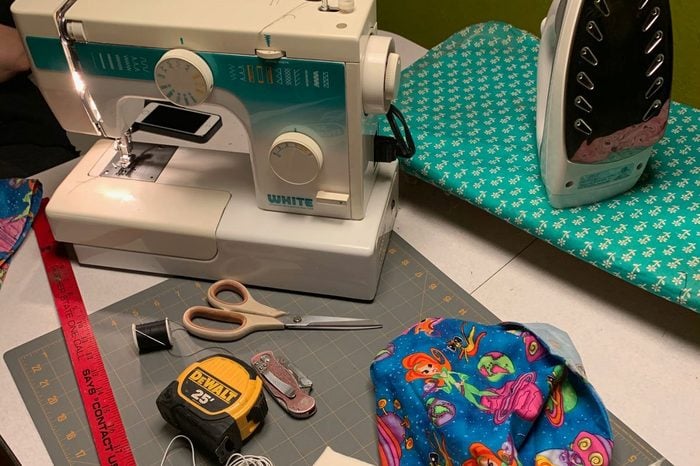
Materials you’ll need:
- For the mask
- Two pieces of fabric about a 9-1/2 in. square each.
- For the strap
- Cloth
- Ribbon
- String
- Shoelaces
- Stretch-band material or rubber bands
- Sewing thread
Tools you’ll need:
- Yardstick
- Tape measure
- Scissors and/or utility knife
- Iron
- Sewing machine or needle and thread
(Psst: Here’s what doctors want you to know about face masks.)
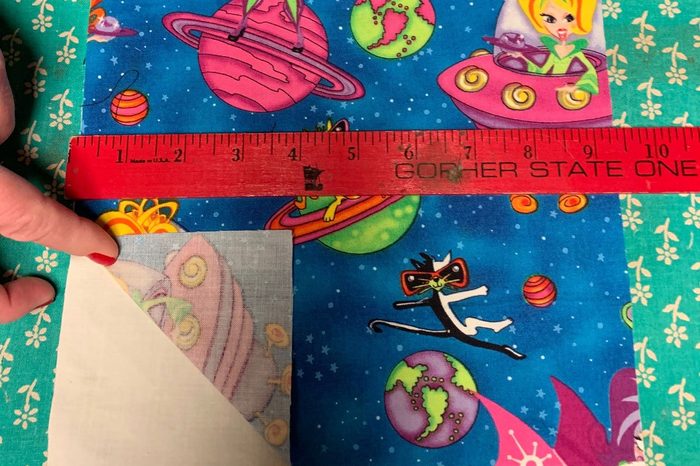
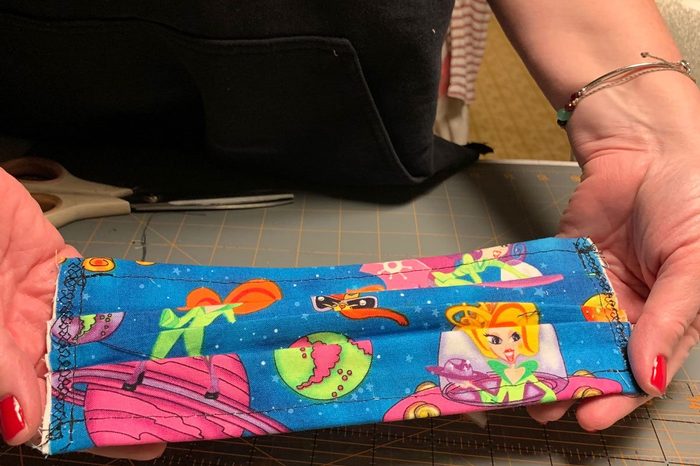
1. Choose and Cut Fabric
A Cambridge University study shows that antimicrobial pillowcases, cotton-blend t-shirts and dish towels filter a higher percentage of particles, but any lightweight washable fabric will give some level of protection. The thinner your fabric, the easier your sewing.
It’s best to choose different types of fabric so you can tell inside from out when putting on the mask. Lay your two fabrics over each other and cut out a 9-1/2 in. square.
(Psst: Here are the coronavirus symptoms to watch out for.)

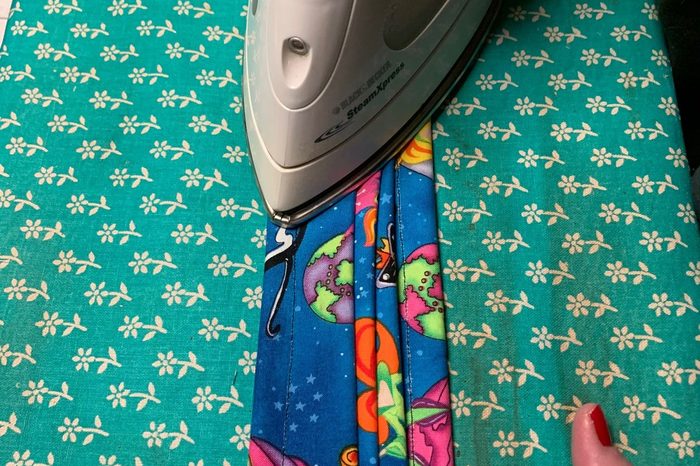
2. Edge Stitch #1
With your two square pieces of cloth layered over each other, fold over two parallel edges about 3/8 in. and iron them flat. Many instructions call for hand-pinning folds and pleats for edge stitching, but if you’re not a seasoned seamstress you’ll find ironing easier.
Once your edges are folded over, stitch those same two edges either by hand or with a sewing machine.
(Psst: Here’s how doctors protect themselves from coronavirus.)
3. Create Pleats
A pleated mask will provide the best universal fit. Keeping the stitched edges top and bottom, iron in three pleats, leaving a total width of about three inches.
(Psst: Here are answers to your quirky coronavirus questions.)
4. Edge Stitch #2
Keeping the pleats in place, stitch the short edges.
(Psst: Here are some essentials that’ll make quarantine a little more pleasant.)

5. Choose Straps and Cut to Length
Strap design can vary depending on what you have on hand. It can be any ribbon, string, shoestring, stretch-band or fabric less than 3/8 in. wide. The two predominant strap styles are tie straps or ear loops.
Tie straps should be cut to about 18 in. long. If you do have stretch band material, it’s best to cut the ear loops at eight inches long. If you decide to use fabric, cut an 18 x 3/4 in. wide strip, fold and iron the edges to its middle, then do a zig-zag stitch up the center.
(Psst: Check out the hand sanitizers health editors love.)
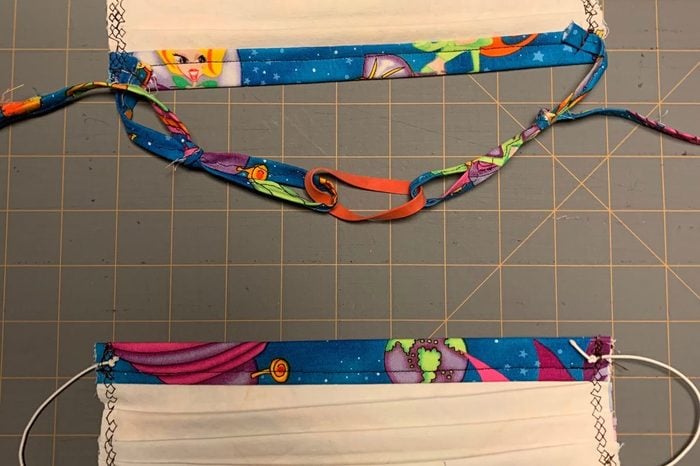
6. Attach Straps
If you’re making ear loop straps, attach them perpendicular to the mask at the corners. With string or any strap material less than a one-quarter inch, it’s best to make a small loop or knot when you stitch it to the face mask.
Tie straps should be attached at a 45 degree angle in the corners of the mask. If you make tie straps, you can tie loops in them and integrate rubber bands. This tip makes for a snug fit on the face and gets around the awkward task of having to tie on the mask on behind your head.
(Psst: Check out the quarantine activities that’ll boost your wellbeing.)
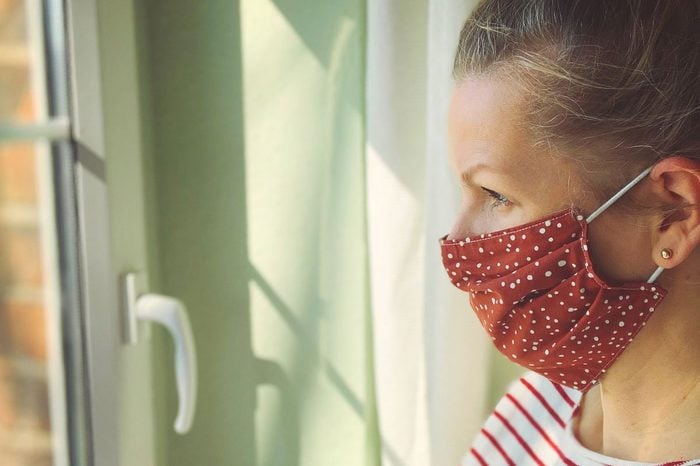
Wearing the Mask
For full effectiveness make sure your mask fits snugly. Despite the inconvenience of tie straps I find them best for getting a good seal on my face. Avoid touching the mask while using it and sanitize your hands after handling it.
Be sure to wash your mask regularly to keep it germ free. It’s not a bad idea to have two or three for yourself and keep them in rotation in your laundry. It’s best to wash in hot water with regular detergent, and dry on a high heat setting.
Always sanitize your hands after handling and do not touch your face. This is also a good rule of thumb if you’re planning on gifting or donating your masks.
Next, learn if you should be wearing gloves to protect yourself against coronavirus.
Newsletter Unit