The Body-Boosting Benefits of a Foam Roller
 Updated: May 11, 2022
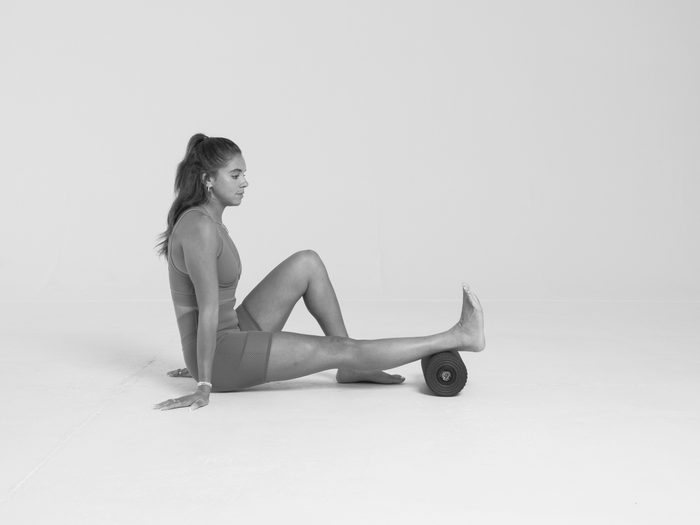
Toronto-based physical therapist Vinh Pham has spent over 15 years studying how good posture and proper alignment connect to long-term health. In his new book, Sit Up Straight, he details how to increase mobility and relieve muscle tightness, soreness and inflammation easily from home using a foam roller.
If you’ve been in a gym, a dance studio, or a yoga class, you’ve undoubtedly seen people working their muscles over these narrow cylinders. Since their introduction as a self-massage device in the 1980s, foam rollers have become a popular fitness and recovery tool.
You might wonder, What does that cylinder do, anyway? Foam rolling is a self-treat¬ment tool that compresses tissues, mimicking certain benefits of a physical therapy session with someone like me. It employs a person’s body weight to release painful knots in muscle tissue (aka trigger points), improve muscular performance and flexibility, extend ranges of motion, warm up muscles before a workout, and kick-start the recovery process after a workout ends. You don’t need to be in pain to benefit from foam rolling, either. This is for futureproofing as much as it is for treatment.
“I recommend between thirty seconds and two minutes per roll. It often helps to do a second set as well.”
How to Roll Your Calves
The calves run along the back side of the lower legs. To roll these muscles, your body should form the letter L when viewed from the side: torso upright (don’t slouch) and supported by extended arms and palms on the floor, hands directly under your shoulders. Extend your legs in front of you, with one or both calves ele¬vated and resting on the roller directly below your knees. Your toes should point up.
Begin rolling back and forth from the top of your calves to the midpoint. Your body will tell you when you hit a problem spot; when it does, sink into it and linger there until the pain or tightness dissipates a bit. Then keep rolling. Next, move the starting position to halfway up the calf or calves, and begin rolling from there to the lowest part, near the ankle. To change the emphasis slightly, point your toes inward or outward.
Variation: To make the sensation more intense, cross one ankle over the one on the roller. The added pressure allows you to dig deeper into the tissues.
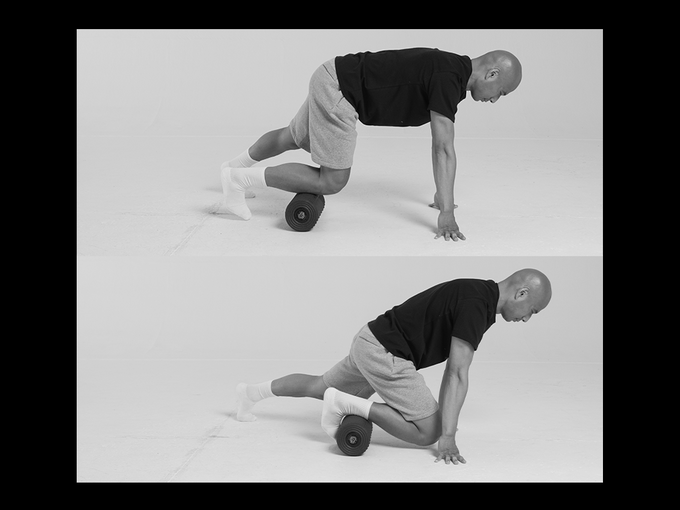
How to Roll Your Shin Muscles
An essential muscle on the front side of the lower leg is the tibialis anterior, which runs along the shinbone. You may not have heard of this muscle, but you’ve probably heard of shin splints, a dull, nagging ache along the inner shin that tends to afflict runners. The tibialis anterior is the muscle that’s hurting with shin splints. Although shin splints are seldom severe, they can lead to more serious conditions like stress fractures without proper treatment. It’s your body’s way of telling you you’re doing too much, too soon.
The function of the tibialis anterior is dorsiflexion, the act of using your ankle to raise your foot toward your leg. To roll this muscle, assume the standard starting position of a push-up: Hands directly below your shoulders; palms on the ground for support; legs trailing behind you.
The toes of one foot should be touching the ground for stability, but the opposite leg should be elevated on a roller, with the point of contact being the top of the shin. Begin rolling back and forth at a measured pace, looking for tight spots and trigger points you can sink into and release. Turning your foot in either direction changes the emphasis and will bring more muscle and less shin bone into contact with the surface of the roller. You can probably roll the entire anterior tibialis without resetting your position, although if you can’t cover the whole muscle, hit the upper half first, followed by the lower half.
How to Roll Your Adductors
The adductors are the five small muscles that combine to form the inner thigh musculature. Their primary function is bringing the thighs together. (Another set of small muscles, the abductors, move the thighs apart.) The adductors originate at the pelvic bone and connect to the thighbone, slightly above the knee.
Sit too much, and these muscles inevitably will tighten, risking groin pain and a reduction in mobility. Rolling can help remedy these adverse outcomes.
Adductors can be a little tricky to access because of their awkward location. In my experience, adductors might be the single most difficult muscles to roll. But if you position your body correctly, you can roll these tricky muscles.
To perform the move, position the roller perpendicular to your body, and then move toward one end of the roller so that one inner thigh is touching it and the other leg lies beyond it. Your elbows and forearms should be flat on the ground; the knee of the leg on the roller should be slightly bent, while the free leg should be pretty straight.
Starting with the roller positioned directly above your knee, gently rock back and forth in the direction of your pubic bone. The roller should travel only 6 to 8 inches. Next, position it above the uppermost point of the previous roll, and rock back and forth from there. It may take a third repositioning to reach to where the adductor meets the pubic bone. From there, gently rock back and forth over the upper inner thigh, up to where it meets the groin.
When you feel a pressure point or any sort of pain throughout the stretch, hold that position until the tension releases, even if it feels uncomfortable. However stop if you feel numbness and tingling.
Whatever you do to the adductors on one side of the leg, perform the same action to the other side as well for the sake of balance.
Variation: To increase the bite on the adductor, use a higher-density roller, once with less give. To make it even more challenging, roll your adductors over a lacrosse ball or softball.
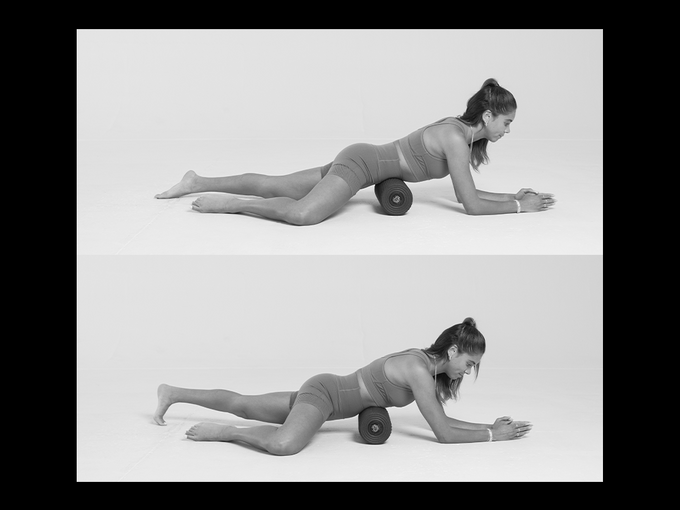
How to Roll Your Quadriceps
Next, I want you to roll your quadriceps, the large muscles covering the front of your thighs. Begin in a plank position, with your elbows and forearms on the mat or floor. Your legs should extend behind you, one or both of them elevated on the roller, with the point of contact directly above the knee. (You can roll both legs at once or do them individually; it’s up to you. One leg at a time allows for more focus on any trigger points that might reveal themselves.)
Begin rolling your thigh back and forth at a measured pace. It doesn’t have to be straight back and forth, either. Tilting your torso to one side or the other changes the emphasis, as does pointing your toes in either direction. Feel for tender spots and areas of tension; once you find them, spend extra time working on those areas. Sometimes I’ll hold my position on a trigger point for thirty to sixty seconds. Get to the top of the quadriceps, too, and then back down to right above the knee.
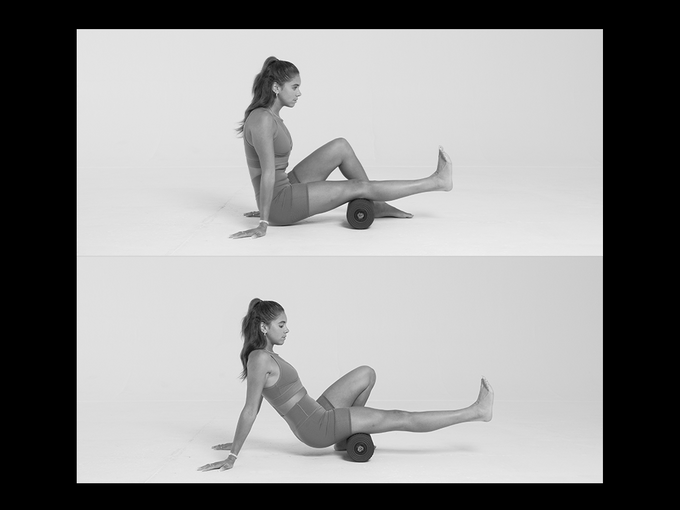
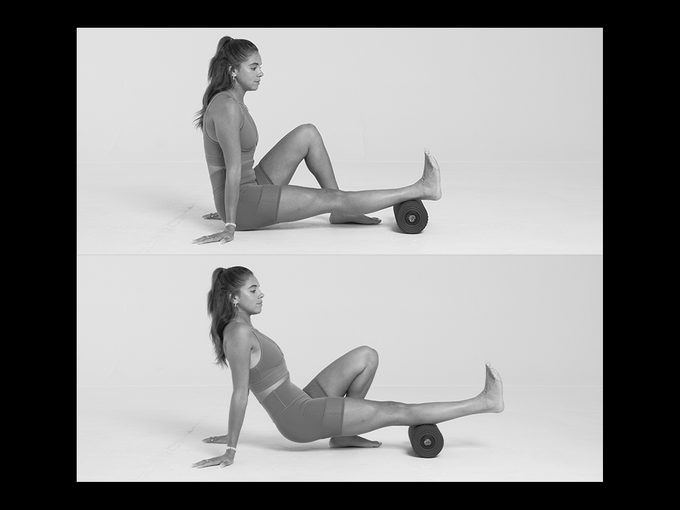
How to Roll Your Hamstrings
Do you constantly feel like you have tight hamstrings, and no matter how much you stretch, it never feels quite right? Foam rolling might help.
The most common knee injury strikes the ACL. If you want to protect your knees from this devastating injury, focus a lot of attention on your hamstrings, the large muscles on the back of the upper legs.
Having strong hamstrings improves your knee stability, protecting against excessive shearing and twisting. Unfortunately, the hamstrings are highly prone to tightening up, especially after long stretches spent sitting. Hamstring tightness limits the muscles activation.
To roll your hamstrings, sit on the floor or a mat with your arms straight, supporting you. The roller should be under your legs, right above the knee. Your legs should extend straight in front of you. Roll halfway up the hamstrings and then back down to the starting position. As with the quadriceps roll, turning your toes inward or outward will shift the emphasis a bit, which I recommend doing. Again, you’re hunting for trigger points. When you find them, focus on that area until any pain or tightness dissipates.
Once you’re done rolling the bottom half of the hamstrings, reset your position so that the starting point is the endpoint from last time, halfway up the back of the upper leg. From there, roll up to the bottom of the glutes and then back down to the midpoint, continuing this back-and-forth motion.
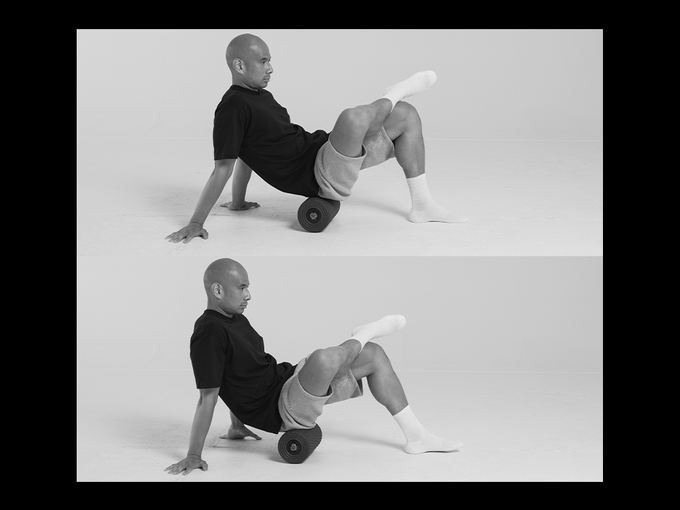
How to Roll Your Glute Muscles
The gluteus medius lies in the outer buttocks region and plays a crucial role in pelvic stability and functional movement, particularly when standing on one leg. When the gluteus medius is too tight or weak, it can cause problems throughout the body, including knee pain. Foam rolling this muscle can release trigger points, allowing for more hip flexibility and mobility and a greater range of motion.
Roll these muscles one side at a time. You want to angle your body to let the roller dig deep into the gluteal muscles, and you won’t be able to do that if the glutes on both sides are resting on the roller simultaneously. For the sake of this descrip¬tion, let’s hit the gluteus maximus (largest glute muscle) on the right side first. Sit on the roller, supporting yourself with your right arm extended behind you and that palm flat on the floor. The point of contact for the roller should be your right glute. Now cross your right leg over your left knee. Using your arms, you want to slightly push yourself forward, specifically rolling over your glute. You should note that the movement is quite small. If you need to maintain your balance, make sure to use your left foot for support.
As you roll, listen to your body; if you feel tightness or pain, linger on the spot for a while, holding it, gently rocking back and forth.
Variation: To make this technique even more intense, use a lacrosse ball instead of a roller. The ball is harder and can dig deep into a given spot.
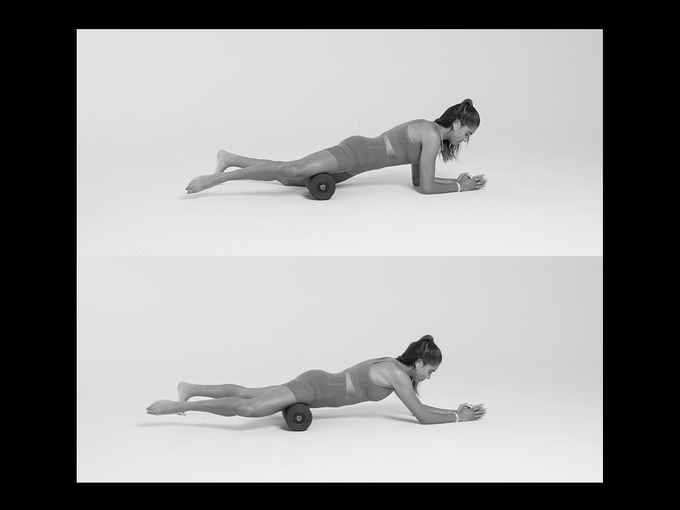
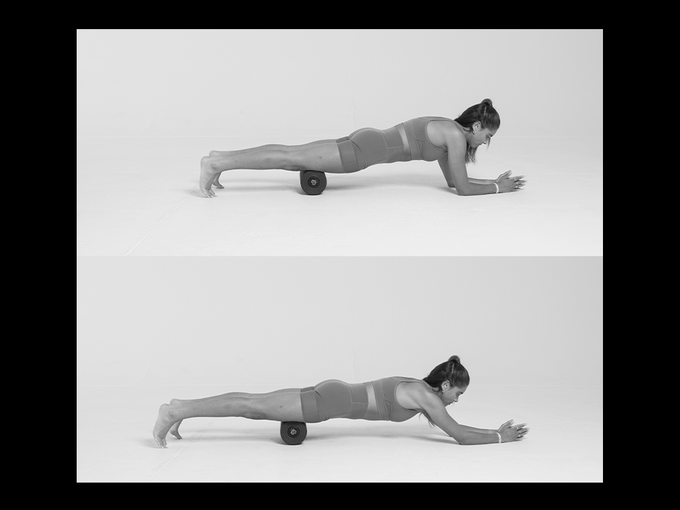
How to Roll Your Stomach
Everyone understands that they need to stretch their back, but rarely do people stretch their stomach area. That’s an oversight. Your stomach tissue often gets tight and compressed over time due to long periods of sitting or endless sets of crunches. The foam rolling goal is to open up the region, mobilize the spine, and release any trigger points or other tension. Not only will opening up your stomach tissue help you feel more relaxed overall, but it also might relieve some of your chronic neck and shoulder stiffness that you feel from working at the office all day.
Begin in a plank position with your elbows and knees supporting your body, and the roller positioned under your stomach as the point of contact. Slowly begin rolling up and down your stomach, directly below your rib cage to directly above your belt line. Go easy at first, especially if you’ve never rolled your stomach before. It’s a sensitive area. If you find a tender spot, gently sink into it until the pain and tightness ease.
After finishing, stand up straight and take several deep breaths. You may find your breathing to be less restricted.
Excerpted from Sit Up Straight: Future Proof Your Body Against Chronic Pain with 12 Simple Movements. Copyright © 2022, by Vinh Pham with Jeff O’Connell. Published by Scribner, an imprint of Simon & Schuster. Reproduced by arrangement with the Publisher. All rights reserved.