Stretch your hips with Standing Pigeon
 Updated: Feb. 25, 2016
Standing Pigeon is a deep hip stretch that can produce intense sensations, but it’s a gem that gets right to the nitty-gritty. The pose also stretches the back, shoulders, knees and ankles
Source: Adapted from Kitchen Yoga by Ruth Shaw
Pigeon Pose, which is practiced lying on the floor, was the first pose I adapted for my students when I introduced the idea of Kitchen Yoga. Inspired by the need for a time-saving method to keep hips loose between classes, the adaptation of this classic hip opener was the perfect solution.
Standing Pigeon is a deep hip stretch that can produce intense sensations, but it’s a gem that gets right to the nitty-gritty, hence its nickname, the “Stretch ‘n’ Kvetch Pose,” because, believe me, it’s gonna make you “kvetch!” But as I say to my students, can you imagine what state your hips would be in without this pose?
There’s icing on this cake, because the pose is also a good stretch for the back and shoulder, knee and ankle joints, so all in all, it’s worth a “kvetch” or two!
Top 5 benefits
‘ Relieves pain and discomfort in the entire hip area
‘ Strengthens hips, knee and ankle joints, increasing mobility and range of motion
‘ Strengthens the thigh muscles
‘ Increases circulation, improving the body’s ability to detoxify
‘ Increases the ability to sit, stand and walk for longer periods of time without discomfort and pain
Off-the-mat suggestions
‘ At your bathroom sink or countertop
‘ At your desk at home or at work
‘ Holding on to a secure handrail or banister
‘ Standing at the window with hands on the windowsill
‘ Any tabletop or flat area
Contraindications
Recent hip or knee surgery or injury; colds; flu; sinus infections; some rotator cuff conditions; recent shoulder or wrist injuries.
The steps
1. Stand in Mountain Pose to ground and prepare.
2. Take three rounds of the three-level breath. (If you don’t know the three-level breath, simply breathe in and out, deeply and calmly, three times.)
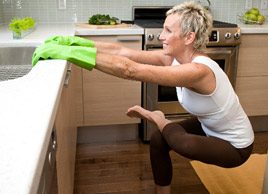
3. Hold on to the edge of the kitchen sink, with your hands shoulder-width apart. Make sure you can hang on securely without slipping. Slip on a pair of rubber (kitchen) gloves if you need extra grip.
4. Walk back and away from the sink until your arms are straight (or close enough), and your hips are in line with your ankles. Step your feet one to two feet (30 to 60 cm) apart. Keep your legs straight, if possible; otherwise, bend your knees slightly.
5. Lower your torso and flatten your back, so that it’s parallel to the floor. Drop your head downward to relax your neck. Take a few deep breaths and stretch out your lower back by gently pushing your hips back before moving on to the next stretch (a nice bonus back stretch!).
6. Bend your right leg, then bend and lift your left leg, placing the left ankle on the right leg slightly below and beyond the right knee. Your left leg and knee will be turned outward, pointing toward the side of the room. Keep the left foot flexed.
7. As you inhale, draw your breath up into the torso, and as you exhale, slowly start nudging the left knee toward the floor while bending the right knee into a deeper standing squat. Try dropping the tailbone and lower back downward to the floor to deepen the stretch into the back muscles.
8. Repeat for three to six breaths.
9. On the last exhalation, straighten the right leg and release the left leg to the floor.
10. Return to Mountain Pose.
11. Repeat on the other side, placing the right leg over the left.
12. For an extra-deep stretch (optional), repeat once more on each side.
For more Kitchen Yoga stretches, check out Kitchen Yoga by Ruth Shaw, reviewed in our September 2009 issue.
Don’t miss out! Sign up for our free weekly newsletters and get nutritious recipes, healthy weight-loss tips, easy ways to stay in shape and all the health news you need, delivered straight to your inbox.